Alloy wheels add style, performance, and value to any vehicle. They’re lighter, more efficient, and more aesthetically pleasing than steel wheels. But they’re also more vulnerable to damage — especially during cleaning. Using the wrong products or methods can scratch, corrode, or permanently harm your wheels.
Table of Contents
- Introduction: Why Proper Alloy Wheel Care Matters
- Understanding Alloy Wheels: Construction and Finishes
- Common Contaminants That Damage Alloy Wheels
- Cleaning Principles for Alloy Wheels
- The Top 15 Alloy Wheel Cleaning Mistakes That Cause Permanent Damage
- Product and Tool Choices: What to Use and Avoid
- Correct Cleaning Techniques Step by Step
- Protective Coatings and Aftercare
- Professional vs DIY Alloy Wheel Cleaning
- Long-Term Maintenance Strategy
- Key Takeaways for Drivers
1. Introduction: Why Proper Alloy Wheel Care Matters
Alloy wheels are a significant investment. Whether factory-fitted or aftermarket, they enhance your vehicle’s handling and appearance. However, because they’re made of aluminium or magnesium alloys, they’re softer and more reactive than steel wheels. Road grime, brake dust, salt, and harsh cleaners can eat into the finish. Knowing how to clean them correctly is essential to maintaining their look and structural integrity.
2. Understanding Alloy Wheels: Construction and Finishes
2.1 Composition of Alloy Wheels
- Typically aluminium mixed with other metals for strength.
- Lightweight, improving acceleration and fuel economy.
2.2 Common Finishes
- Painted: A base coat and clear coat protect the metal.
- Powder-Coated: More durable than paint, but still vulnerable to harsh chemicals.
- Polished or Chrome-Plated: Highly reflective but easily etched by acidic cleaners.
- Diamond-Cut: Machined surface sealed with lacquer, prone to corrosion if damaged.
Knowing your finish type is crucial because some cleaners are safe for one type but harmful to another.
3. Common Contaminants That Damage Alloy Wheels
- Brake Dust: Iron particles that become corrosive when hot.
- Road Salt: Accelerates corrosion, especially in winter.
- Tar and Oil: Sticky residues that attract dirt.
- Acid Rain: Deposits acidic films that etch lacquer.
- Industrial Fallout: Metal particles from railways or factories.
These contaminants can fuse with wheel surfaces if not removed promptly, making cleaning more aggressive — and risky.
4. Cleaning Principles for Alloy Wheels
- Gentle First: Start with the least aggressive method.
- Right Product for the Finish: Acid-free, pH-balanced cleaners are safest.
- Cool Wheels Only: Heat accelerates chemical reactions and staining.
- Soft Tools: Use microfibre cloths, soft brushes, and foam applicators.
- Regular Maintenance: Clean wheels frequently to prevent buildup that requires harsh cleaners.
5. The Top 15 Alloy Wheel Cleaning Mistakes That Cause Permanent Damage
5.1 Using Acidic Wheel Cleaners on Every Finish
Strong acidic or alkaline cleaners can strip lacquer, dull paint, or etch polished surfaces. Always read labels and choose pH-neutral products for routine cleaning.
5.2 Cleaning Wheels When Hot
Spraying cleaner on hot wheels causes rapid evaporation, concentrating chemicals and increasing etching risk. Always allow wheels to cool.
5.3 Using the Wrong Brushes
Wire or stiff-bristle brushes scratch coatings. Even plastic brushes can cause micro-marring. Opt for soft boar’s hair or dedicated wheel brushes.
5.4 Pressure Washing at Close Range
High-pressure water jets at close distances can lift paint, damage seals, or drive contaminants deeper. Maintain a safe distance (at least 30–40 cm).
5.5 Not Rinsing Thoroughly Before Cleaning
Skipping the pre-rinse means dragging grit across surfaces with your sponge or brush, causing scratches.
5.6 Overusing Degreasers
Strong degreasers can strip wax or ceramic coatings, leaving the metal exposed to corrosion.
5.7 Neglecting the Inner Barrel
Cleaning only the face allows brake dust to accumulate inside the barrel, corroding from the inside out.
5.8 Cross-Contamination of Tools
Using the same mitt for wheels and body transfers abrasive brake dust to your paintwork and vice versa.
5.9 Leaving Cleaner to Dry
Even mild cleaners can leave water spots or chemical stains if they dry on the surface. Work one wheel at a time.
5.10 Skipping Protective Coatings
Without wax or sealant, wheels accumulate contaminants faster, requiring harsher cleaning next time.
5.11 Using Household Cleaners
Products like oven cleaner or bathroom bleach can irreparably damage wheel finishes.
5.12 Not Checking Product Compatibility with TPMS
Harsh chemicals can attack the rubber grommets or sensors of tyre pressure monitoring systems.
5.13 Ignoring Small Chips or Scratches
Once the coating is breached, moisture seeps under the lacquer, leading to peeling and corrosion.
5.14 Using Steel Wool or Abrasive Pads
Though tempting for stubborn spots, these will gouge and scratch the metal or clear coat.
5.15 Skipping Drying After Cleaning
Leaving water on wheels encourages water spots, mineral deposits, and oxidation.
6. Product and Tool Choices: What to Use and Avoid
6.1 Safe Cleaners
- pH-neutral wheel shampoos
- Iron fallout removers (used sparingly)
- Citrus-based degreasers
6.2 Safe Tools
- Soft microfibre cloths
- Non-scratch wheel brushes
- Foam applicators
6.3 Protective Products
- Wheel waxes
- Ceramic or polymer coatings
- Sealants formulated for high-temperature surfaces
7. Correct Cleaning Techniques Step by Step
- Pre-Rinse: Remove loose dirt with low-pressure water.
- Apply Cleaner: Use a pH-neutral wheel cleaner, working on one wheel at a time.
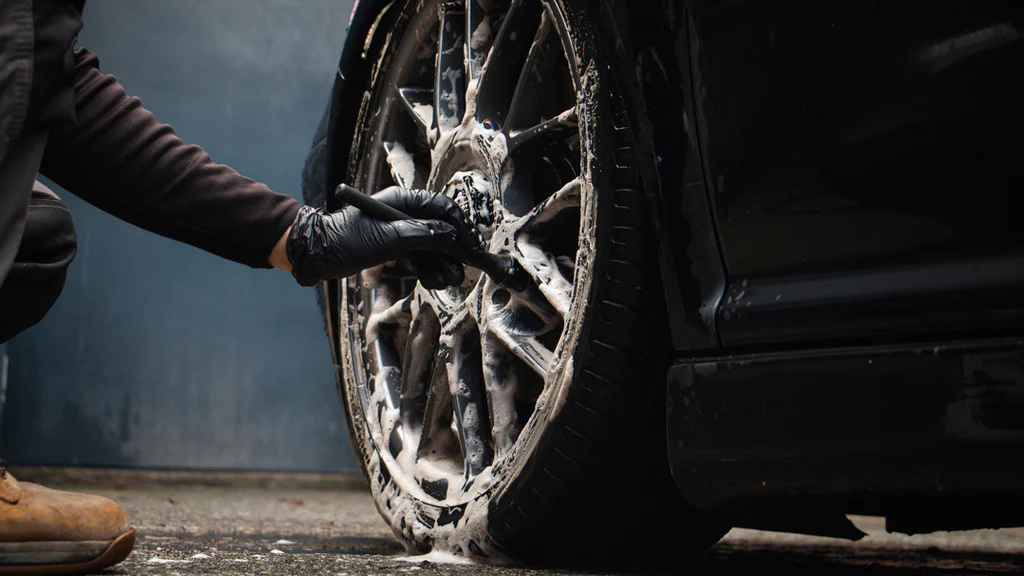
- Agitate Gently: Soft brush or mitt for barrels, lug nuts, and calipers.
- Rinse Thoroughly: Ensure all cleaner is removed.
- Dry Completely: Use a microfibre drying towel or blower.
- Inspect and Touch Up: Spot any chips or scratches and treat immediately.
- Apply Protection: Wax or ceramic coating to reduce future contamination.
8. Protective Coatings and Aftercare
8.1 Benefits of Wheel Sealants
- Reduces brake dust adhesion.
- Easier cleaning next time.
- Added UV and chemical resistance.
8.2 Ceramic Coatings for Wheels
- Last longer than waxes.
- Resist high temperatures from braking.
- Provide a glossy, hydrophobic finish.
8.3 Maintenance After Coating
- Use mild shampoos.
- Avoid harsh chemicals that degrade the coating.
- Regularly top up with spray sealants for longevity.
9. Professional vs DIY Alloy Wheel Cleaning
9.1 When to Go Professional
- Severe contamination or baked-on brake dust.
- Diamond-cut wheels needing refinishing.
- Deep scratches or corrosion.
9.2 Advantages of Professional Cleaning
- Access to specialized tools and lifts.
- Knowledge of different finishes and safe products.
- Ability to spot structural damage early.
10. Long-Term Maintenance Strategy
- Clean Frequently: At least once every two weeks if driving regularly.
- Inspect Wheels at Each Wash: Look for chips, cracks, or corrosion.
- Rotate Cleaning Tools: Dedicated brushes for barrels vs faces.
- Reapply Protection: Wax every 1–2 months or ceramic coat annually.
- Winter Prep: Extra protection before road salt season.